Fresh Water
Water is the absolute necessity and the basic element of everyone’s survival. As the common and proven fact says, you cannot survive 3 days without water. If you’re planning to live off the grid, establishing an off grid water system should be high in your list of priorities, if not at the top of the list.
One of the first things you need to know when preparing to live off-grid is where, how, and how often you will get your water. You need to know what your off grid water sources are going to be. A single person can go through 165-127 litres of water a day, whether it be drinking, bathing, washing dishes or using the toilet. It all adds up and that isn't taking into account all of your gardening needs.
Off-Grid Water Sources
There are quite a few options when it comes to sourcing water for your off grid lifestyle. Take a look at the list below:
- Rain water: This is an excellent source of water to complement the water source that you already have. It is possible to go weeks without rain, therefore, you should never depend on rain water as your primary source of water. That being said, it is incredibly wasteful to let the rain water run free. Some people invest in a rainwater filtration or purification system to make it safe to drink. Depending on where else you are sourcing your water, however, you may want to use rain water just for irrigation and/or your livestock.
- Natural/Wild water: Water from a creek or stream. Flowing water is generally more filtered than sitting water. You can even use it as hydropower to produce free electricity.
- Well/bore water: Well water is almost always guaranteed to taste just a little bit different every time you fill up your glass. Do not be alarmed. The weather, especially if you live near the coast, can influence the flavour of the water depending on what minerals are leached into the water from the surrounding land. As long as you regularly have your water tested regularly for harmful bacteria and the well water passes the test, it is safe to drink the water. While investing in a well is not cheap, it is, however, an incredibly reliable, essentially unlimited, and completely free source of water.
This list is by no means complete. That being said, the most successful off grid properties will source their water from more than one place.
Rainwater: Collecting and Storing
Depending on your desired scale, you can collect rainwater from your roof into a rain barrel, or you can install large tanks to supply your entire household.
You should know how much rain you can collect in a year, which you can calculate with this formula:
A rule of thumb is every square metre of roof space collects around 1 litre of water for every 1 millimetre of rainfall. So, if 5 millimetres of rain falls, and you have 100 square metres of roof space to collect rainwater, you can collect 500 litres of water in one go.
5 millimetres rain x 100 square metres = 500 litres
Many people employ their roofs. The rain hits the roof and runs down to the gutters (which need to have a screening). The rain then goes through a downspout filter and a first flush diverter. These filters help remove contaminants. Before entering the tank, the water rushes through the tank screen, which keeps pests and mosquitoes out.
You can store your rainwater in a number of different types of vessels:
- Rain barrels: A barrel is installed at the base of the gutter downspout. It is easy to install, readily accessible, and the barrels do not take up much space. However, they can easily overflow as capacity is normally at around 50-200 litres.
- “Dry” system: This system has a larger storage capacity than the barrel, and the collection pipe dries after every rain. It can store a lot of rainwater, which is good for environments with infrequent rain falls. It is an inexpensive and simple system, but the tank must be located next to the house.
- “Wet” system: Collection pipes are underground and connect multiple downspouts from more than one gutter. The underground piping fills with water, overflows to the vertical pipes, then spills into the tank. Water-tight connections must exist in the underground collection piping and the downspouts, and the tank inlet’s elevation must be lower than the lowest gutter. This system works well for large-scale collection, and can be located away from the house, but it is expensive and somewhat complex to install and maintain.
We have a more detailed article on collecting rainwater, you should really check it out for additional information on this important subject.

Wild Water: Installation of Water Pipes and Plumbing
Whenever possible, it is best to use gravity to your advantage, and to keep geographic proximity in mind. Here is how you can plumb wild water to your holding tank.
- Step 1: The sump hole should be right next to the water source. That way the water pools into the hole. Fill the bottom of the hole with rocks and a layer of sand.
- Step 2: Submersible pumps that push water are more effective than pumps that pull water, especially if the water is going uphill. You need to properly install your pump so that it is secure and not susceptible to sucking up the surrounding mud, sand, or other debris.
- Step 3: Connect your power source to the pump, remembering that electricity and water do not mix.
- Step 4: Route the water to your holding tank. A 150 metre run should have a pipe that is 50 millimetres in diameter. Any time the pipe needs to change direction, the angle should be no larger than 90 degrees. Keep in mind the distance and elevation in creating your route.

Wells: Types, Permissions, Well Pumps
There are a couple different types of wells. Rest assured, there is probably one that will work for you.
Types of Wells
- Dug wells: How did people get their water before machinery? They dug deep holes in the ground by hand until water started seeping out from the rocks. When the incoming water was flowing faster than the hand-digger could dig, the digger stopped digging. While you can most certainly dig your own well, keep in mind that these are less safe than drilled wells. This is because they are shallower, making them more prone to contamination. In times of drought when the water table drops, the well might also run dry.
- Driven wells: A small pipe with a screen on the end is driven into soft ground until the pipe hits the water table. Like hand-dug wells, they are shallow, making them susceptible to contamination and running dry.
- Drilled wells: A combination of machinery, including drill bits, percussion bits, and auger bits, work together to drill a hole that can be more than 300 metres deep. The drill rig is mounted on a big truck, and is operated by a professional. Once the well is drilled, a pump is installed to bring the water up to the surface. This is your most expensive, but most reliable and responsible way to dig a well.
Permission to Dig a Well
You need permission to dig a well, which you can obtain by submitting an application to your council. The application will require certain information, and sometimes it is best for the well contractor to apply for the permit.
Information below is for Auckland Council, please check with your local council if they require any additional information.
- The location of your drill site and total property area.
- A map reference in New Zealand Transverse Mercator (NZTM) format.
- A locality plan or aerial photo at 1.500 scale.
- Details of the agent, consultant or drilling contractor.
- Details about how the water will be used.
- Estimated quantities of water to be taken (maximum daily quantity cubic metres per day and annual quantity cubic metres per year).
- The number of proposed bores (with separate sheets if there are multiple bores showing the site locations and map references).
Your site plan shows what is on your property and where the well is going to be dug. The well must be a minimum distance from the road, bodies of water, and septic systems.
- A site plan including the location of:
- the proposed bore or well
- all bores within 200m of the drilling site
- where the water is to be used
- existing and proposed underground services, including public drains in close proximity to bore site
- land use within 50m of drilling site
- road frontage and names
- septic tanks, offal pits, potential contaminated sites or waste disposal areas within 150m of the proposed bore or well.
Once you have your permit, you can start digging your well, not before.
Powering Your Well Pump
If you decide to drill your well, you must have some sort of power to fuel the pump that brings your water to the surface. Depending on the depth of your well, you have two choices: jet pumps and submersible pumps.
Jet pumps are for shallow wells. They are mounted above the ground and suction the water from the well. Submersible pumps are popular for deep private wells. Like the name implies, they are installed inside the well casing and connect to a surface power source.
No matter the pump, however, try to use the abundant natural resources that are around you as a power source for your pump:
- Wind powered pump: Great for flat terrain where wind is strong.
- Solar powered pump: If the sun stops shining, you are dead anyway.
- Hand pump: The most budget friendly option is the hand pump.
Once you have your well or sump basin established and your particular pump installed, you need to route the water to your home and everywhere else that you need the water to go.
No matter your methods of collecting and storing water, you need to know how to filter it into potable (drinkable) or non-potable (not drinkable) use.

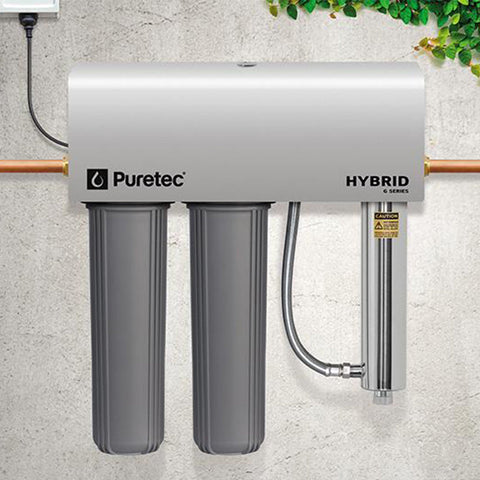
Water Filtration and Purification Systems
It is important to filter your water, even if it looks clean. This is because harmful bacteria and pathogens, especially if the water came from a contaminated source, can kill you. You need to invest in a good off-grid water filtration system.
Consider the following when looking at a system:
- Type and level of treatment: Must use filters and UV radiation (not chemicals) to remove physical matter, contaminants, bacteria, viruses, and protozoa
- Powered VS gravity fed: Gravity fed is not as fast as powered filters. Gravity can run independently of power, although there are some viable options that run off of solar.
- Flow rate: Gravity will yield about 4-15 litres per hour whereas powered will yield 4-15 gallons per minute or more. Figure out what you need.
- Water storage capacity: You want a system that is built to filter, not store.
There are simple DIY water filtration systems you can set up, however, these tend to be more unreliable.
- DIY Bio-Filters: Filters, does not disinfect
- UV/Sunlight systems: Does not filter, disinfects
- Ceramic: Filters and disinfects
- Chemical: Does not filter, disinfects
- Distillation: Filters and disinfects
- Boiling: Does not filter, disinfects
For much more detailed information on many methods of water filtration, we invite you to read our article on water purification. (add link)
Final Words
Hopefully, we were able to address most of the questions that pertain to off grid water systems and water sources. You are now more prepared to face this important challenge.
Naturally, there is much more to learn if you intend to live off the grid.
To complement the information on off-grid water systems, you should also read our guide for off grid septic systems. Disposing and recycling wastewater is a highly important issue, and you should devote some time and resources to establish your own off grid sanitation.